how to set up a virtual environment in Thonny IDE – Easy setup
what is Thonny IDE?
Thonny is an integrated development environment (IDE) for Python that is designed for beginners and education. It has a simple and user-friendly interface, a built-in debugger, and a code editor that supports syntax highlighting, auto-completion, and code formatting. In another article post, I have written more about the Thonny IDE and discussed its strengths, its ideal user, and what you can with it.
In this post, you will learn how to create a virtual environment in the Thonny Python IDE.
what is a virtual environment?
A Python virtual environment is like a secret box for your Python projects. It’s a place where you can keep all your Python projects separate from each other, so they don’t get mixed up. That way, if you’re working on two different projects that use different versions of Python or different Python libraries, they won’t get mixed up.
steps to create a virtual env in thonny
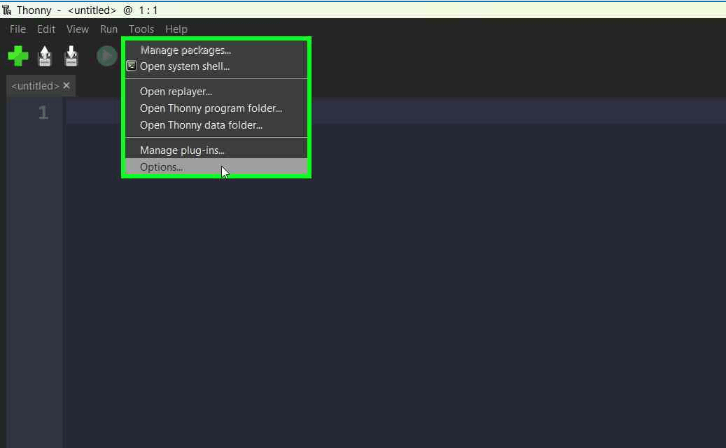
Open your Thonny IDE, go to Tools -> Options.
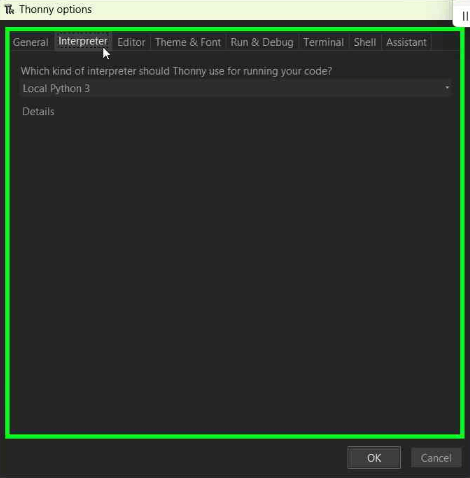
Then choose the Interpreter tab:
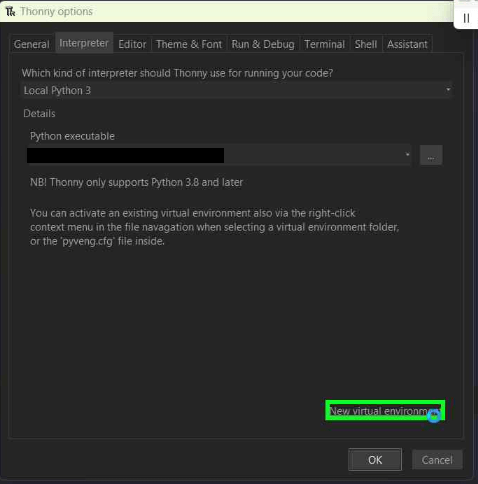
At the bottom right click on New Virtual Environment
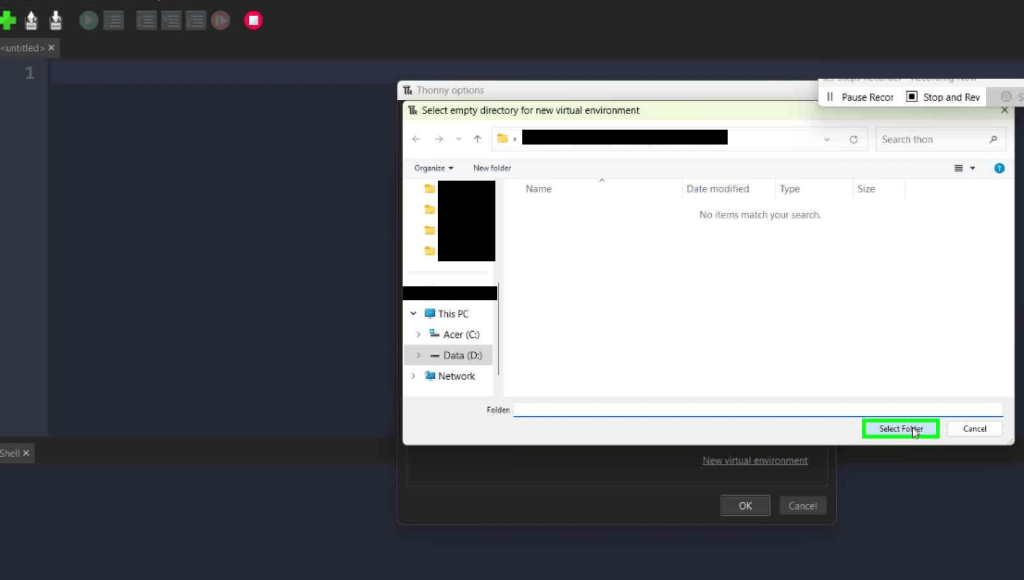
Create and select an empty folder. Note that the name of the folder will be the name of Thonny virtual environment.
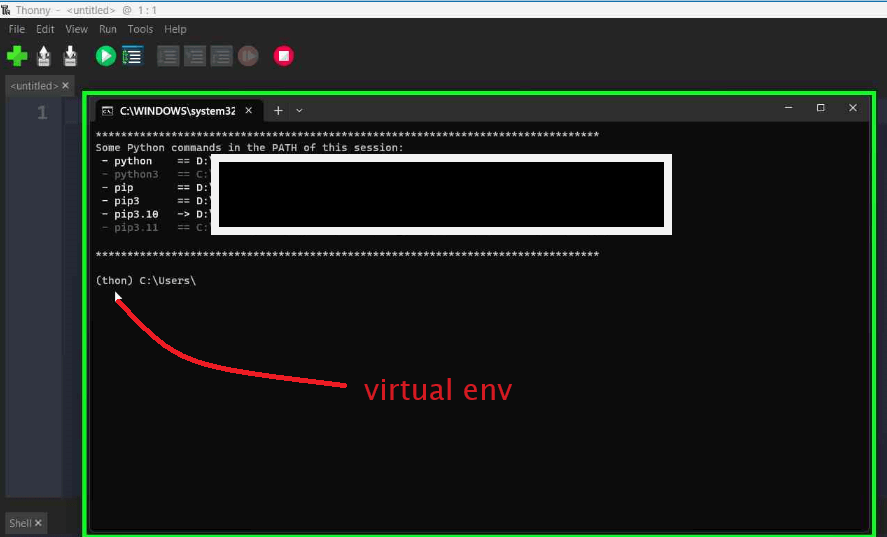
The process of creating a virtual environment by Thonny starts. When it is over, you can open the System Shell form the Tools in Thonny. You will see the name of the virtual environment appears. (I named my folder Thon, so the name of the virtual environment is Thon)
Now you can install packages here.